 Examples
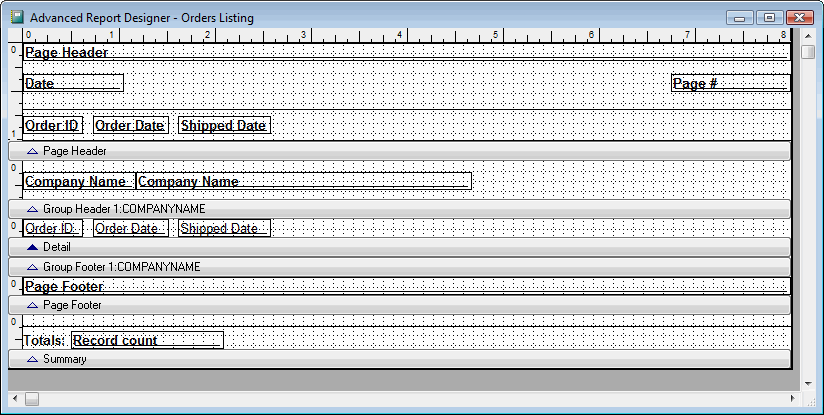
Let's create an advanced layout for the Posted Transaction report we created in Lesson 1 of the tutorial. First, click this report in the Report Wizard and choose Edit. Go to Step 5, then turn on the Advanced Layout setting and click Edit. The Advanced Report Designer appears as shown below.
Let's start by putting the transaction date in the group header band along with the transaction number. Move the Transaction Date label to the group header band by clicking on the label and dragging it into the group header band to the right of the transaction number. Do the same with the Transaction Date field. We'll want to remove the remaining detail fields to the left, so click the Account Code label, then hold down the Shift key and click the other labels and detail band fields and the Debit and Credit fields in the group footer and summary bands, and dragging the selected objects to the left. The report should now look like this:
Let's add a grey rectangle in the group header to make it stand out. To make room for the rectangle at the left, select all objects in the group header band by holding down the Shift key and double-clicking the grey bar for the band, then click one of them and drag slightly to the right. Now click the Rectangle object ( ) in the Report Controls toolbar, click near the upper left corner of the group header band and drag to the lower right corner to draw a rectangle. Click the Background button (
 ) in the Color Palette, then click the light grey button to make that the fill color for the rectangle. Oops, the rectangle now completely covers the labels and fields in the band. Click the Send to Back button (
 ) to move the rectangle behind the other objects. The report should now look like this:

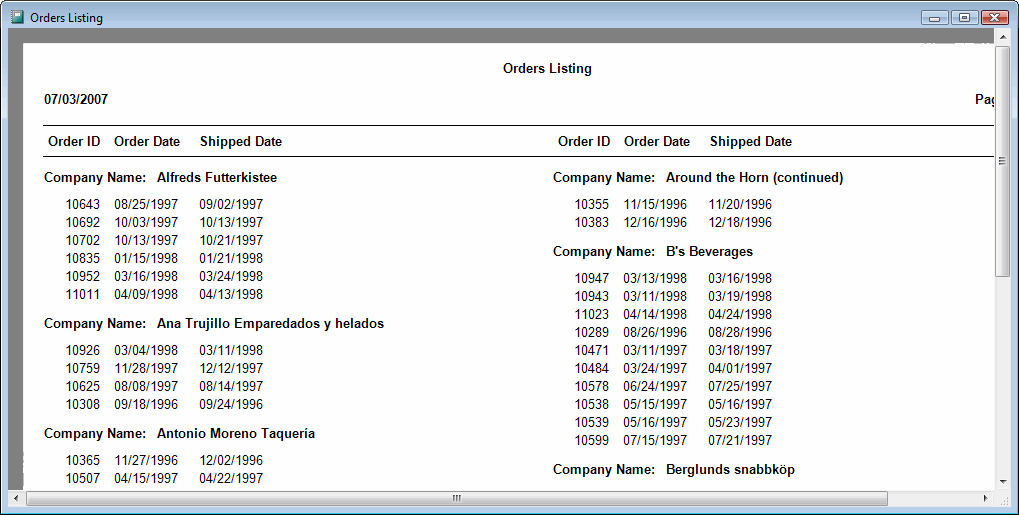
Choose Print Preview from the Report menu to view the report. It should appear similar to the following:
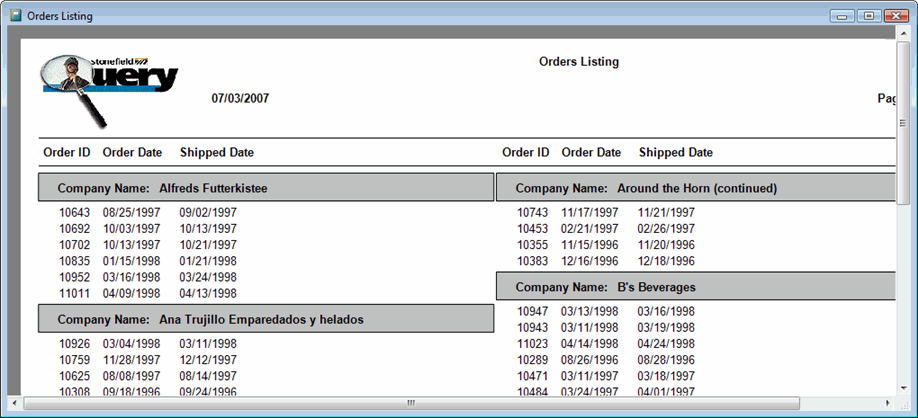
Let's add a logo to the report. To make room for the logo, click the grey bar for the Page Header band and drag it down. Select all the objects in that band by holding down the Shift key and double-clicking in the grey bar, then click one of them and drag down. Click the Picture button ( ) in the Report Controls toolbar, then click near the upper left corner of the Page Header band and drag to the right down to about 1.5 inches deep. When the Picture Properties dialog appears, click the button beside the textbox for Image Source and choose an image file. Choose the Scale Contents, Retain Shape option and choose OK. You can then rearrange the other objects in the Page Header band around the logo as desired. Here's an example:
Preview the report again. Here's the finished product:
© Stonefield Software Inc., 2025 • Updated: 08/29/18
Comment or report problem with topic