 Lesson 1: Creating a Report
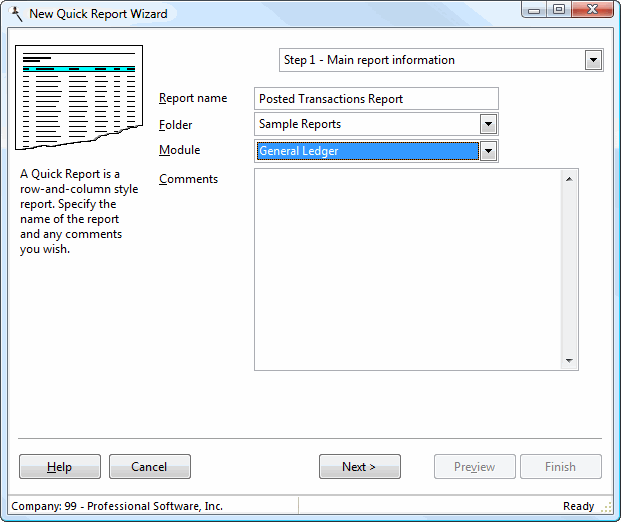
Let's create a nice concise General Ledger Posting Transactions report. First, click the New button. Choose Quick Report from the Report Types dialog and click OK. The New Quick Report Wizard will appear. In Step 1, enter "Posted Transactions Report" for the Report Name. For Module, select "General Ledger". Select which folder you want the report to go in and enter any comments you wish about the report.
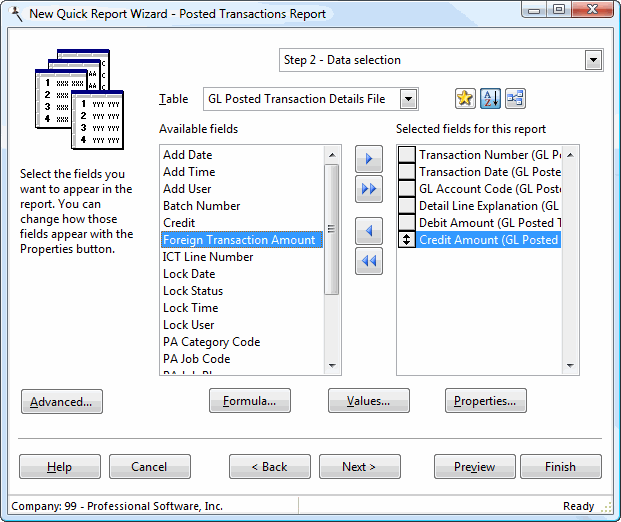
Click the Next button twice to go to Step 2. For Table, select "GL Posted Transactions Header". Then, find each of the following fields in the Available Fields list, click it, and click the Add button (which looks like a right arrow) to add it to the Selected Fields list: "Transaction Number" and "Transaction Date."
Select "GL Posted Transactions Detail File" in the Table list. Find each of the following fields in the Available Fields list, click it, and click the Add button: "GL Account Code," "Detail Line Explanation," "Debit Amount," and "Credit Amount."
Let's see what the report looks like: click the Preview button (the following image shows a "zoomed out" version of the report, which you can set by changing the page magnification to 75%).
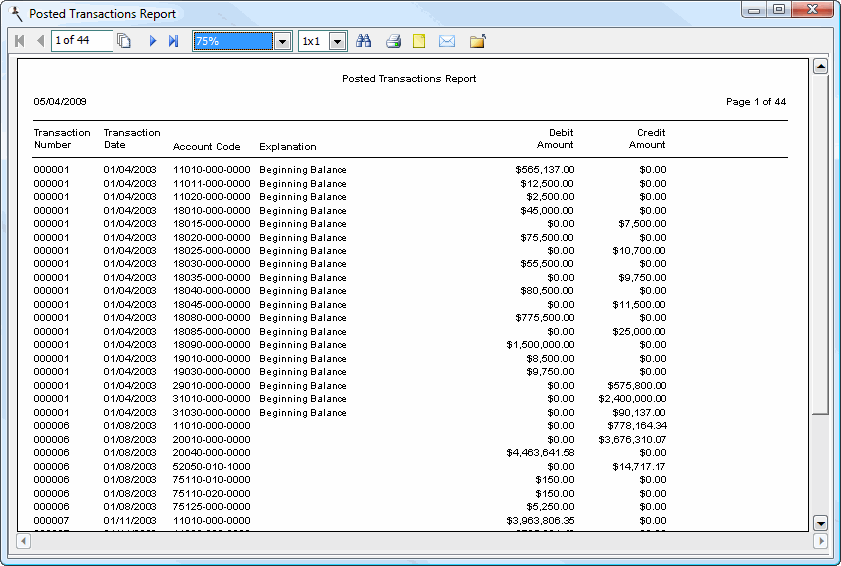
Not bad, but it needs some work. Let's format it so it looks like we expect. Close the preview window, then select each field in the Selected Fields list, click the Properties button below the list, and change the settings as shown below:
| Field | Page | Property | Value |
|---|---|---|---|
| Transaction Number | Grouping | Group on this field Show count in group footer | Checked Checked |
| Debit Amount | Format | Use default format Display zero as blank | Unchecked Checked |
| Credit Amount | Format | Use default format Display zero as blank | Unchecked Checked |
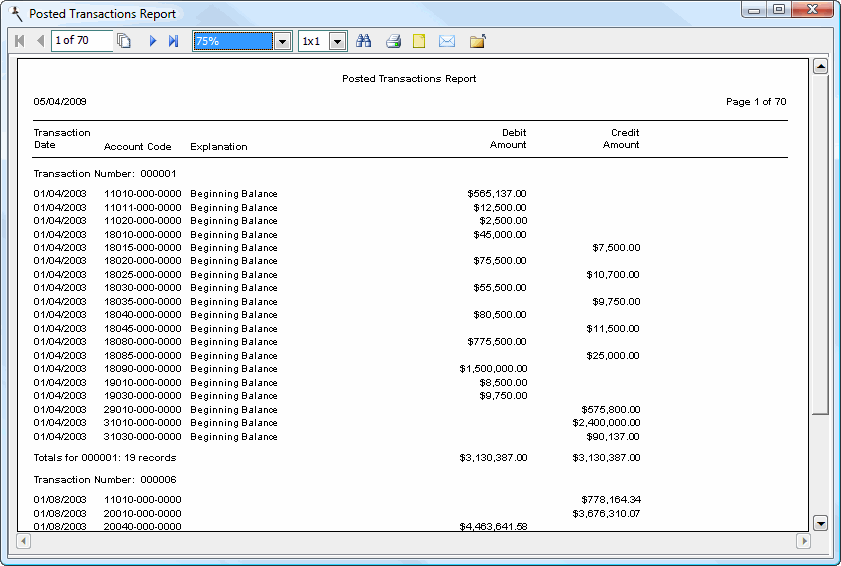
Let's preview it again.

That's more like it. The listing is grouped by transaction number, and a count of the number of items for each transaction number is shown. Debits and credits are shown with commas and are printed in the correct column. But wait; something is missing. We don't have totals. Close the preview window, select Debit Amount, click Properties, select the Format page, and for Summary, choose "Sum." Do the same for Credit Amount, then preview again. Finally, we have the report we want.
To save this report for future use, click the Finish button. Your new report appears in the Reports Explorer.
© Stonefield Software Inc., 2025 • Updated: 01/20/21
Comment or report problem with topic