 Outputting a Wide Report Without Splitting Columns
If you have a quick report with a lot of fields (more than will fit across the page), Stonefield Query moves the fields that don't fit to the next row. Similarly, if there are a lot of unique values in the column field used in a cross-tab report, Stonefield Query splits the columns into separate pages based on the page width.
If you don't plan on printing a wide report like these, only preview or output to PDF, you can tell Stonefield Query to use a very wide page width so it doesn't split the columns or move fields to the next row. To do that, you'll use a template with a custom paper width that's very wide. There are three steps.
1. Create a custom paper width for your printer.
These instructions are for Windows 10, so the exact tasks may be a little different depending on what operating system you use. Watch step 1 in this YouTube video to see how to do this.
Open the Windows Control Panel and choose View Devices and Printers.
Select the desired printer and click Print Server Properties at the top of the window.
In the Print Server Properties dialog, turn on Create a new form and enter a name such as MyWidePage.
Enter a large value for the width, such as 24 inches.
Click the Save Form button, then click Close.
2. Create a template using the custom paper size
Start Stonefield Query.
Choose Template Editor from the Tools menu or the Tools tab of the ribbon.
Select an existing template and click the Copy button. Give the copy a new name and click the Edit button.
Choose Page Setup from the File menu and make sure the desired printer is selected.
Click the Page Setup button and choose your custom size from the Size dropdown. Click OK.
Make sure Width is set to the width you used when you created the custom paper size. If it isn't, click Page Setup and change Orientation. The image shown may not look right (tall and skinny rather than wide) but ignore that. Click OK and make sure Width is now correct. Click OK to close the Report Properties dialog.
Choose Save from the File menu, then choose Close.
3. Use the template for your report
Edit the report and go to step 5 in the report wizard.
Select the new template name in the Template dropdown.
Click Preview. The report should now use the custom page width and not split columns or move them to the next row.
You can use this same template for any report you want to output wide.
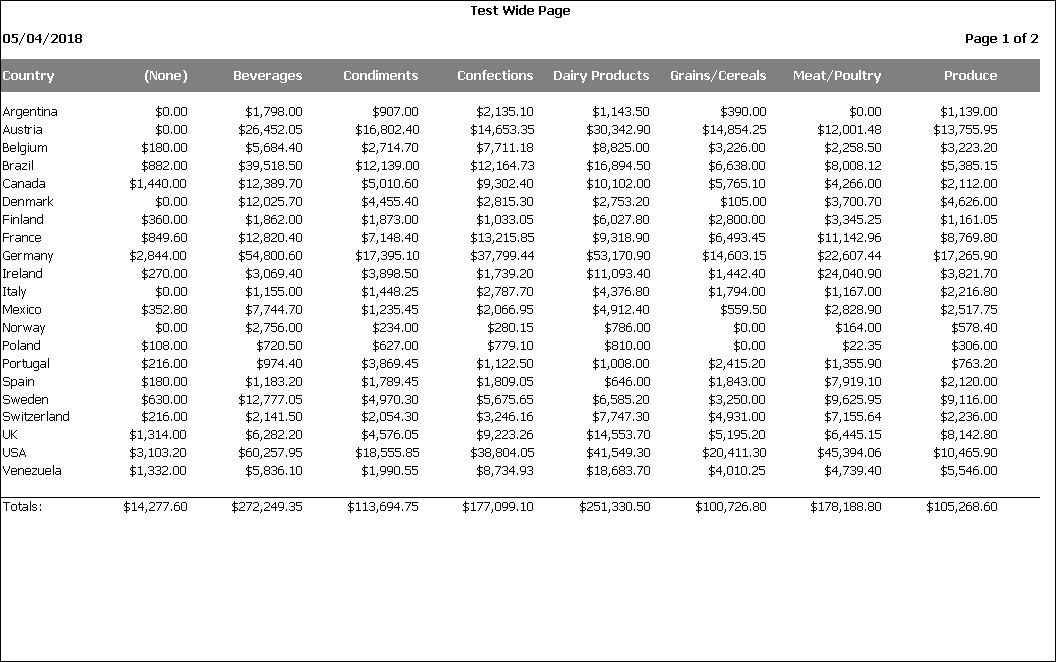
For example, here's a cross-tab report using a paper width of 11 inches: notice it takes two pages because some columns don't fit on page one:
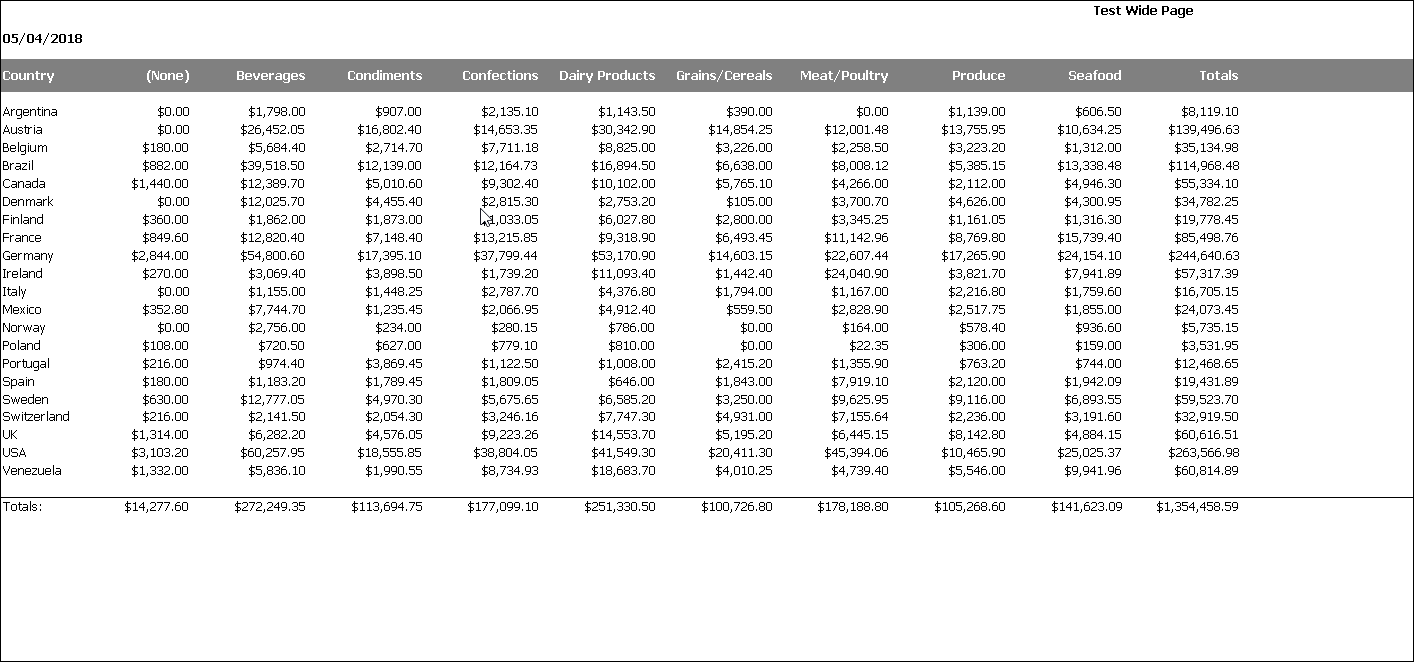
Here's the same report using a custom paper width of 24 inches: notice it's only a single page because all columns appear on the same page:
© Stonefield Software Inc., 2025 • Updated: 02/01/21
Comment or report problem with topic