 Setting up Stonefield Query
The first time you run Stonefield Query, you are asked where Stonefield Query puts its files.
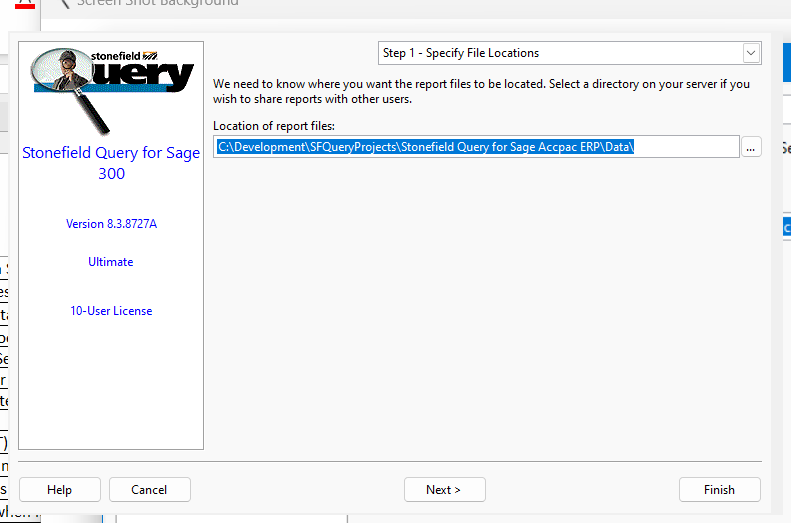
You can specify any directory for the Stonefield Query files, but we recommend a directory on a server; that way, you can share reports with other users.
After specifying the settings in Step 1, click the Next button.
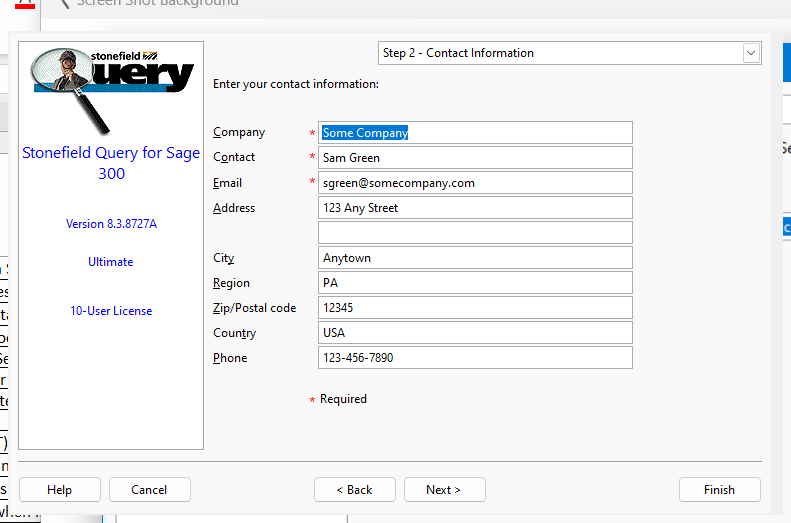
The options in the Contact Information page are used as contact information when you send an error report to us. The options are self-explanatory. The ones with a red * are required.
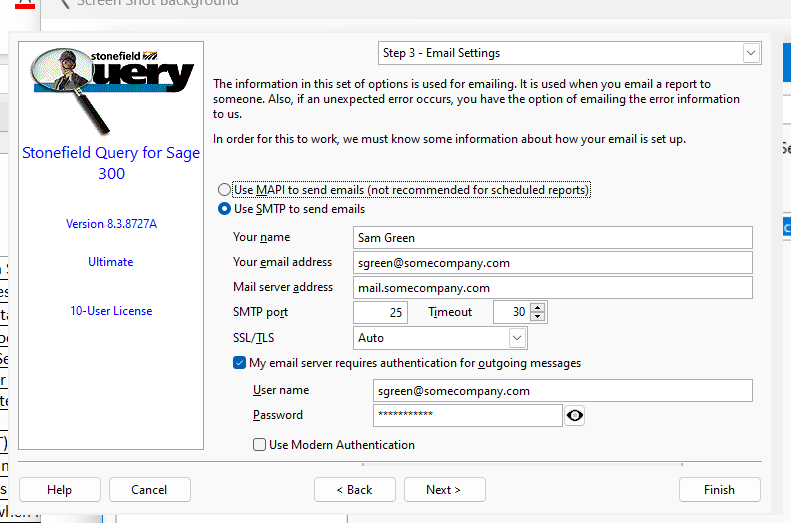
The options in Step 3 are used when you want to email a report to someone or if an unexpected error occurs in Stonefield Query, in which case you have an option of emailing an error report to us so we can resolve the problem. The options are the same as in the Email page of the Options dialog.
After specifying the settings in Step 3, click the Next button.
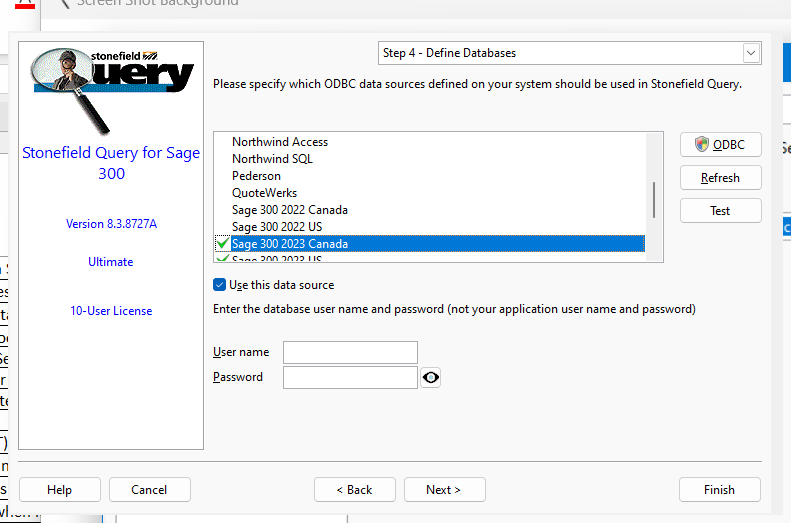
You must next define which ODBC data sources defined on your system to use in Stonefield Query. ODBC, or Open DataBase Connectivity, is a database access technology built into Windows that provides a consistent way of accessing data from different database engines. Using ODBC means Stonefield Query doesn't have to know details such as where the server is located, which database to access, etc.; this information is defined in an ODBC "data source" you or your system administrator sets up.
This step shows a list of ODBC data sources. To specify that Stonefield Query can access a certain data source, select it in the list and turn on the Use this data source option. Stonefield Query needs the user name and password to access this database (this is the database user name and password, not your Windows or other application user name and password), so enter those in the text boxes provided. Click the "show password" button toggle between displaying the password in plain text or as "*****" (the password is always stored encrypted regardless of the setting of this button). After entering the password, you are asked if you want to test the connection to the data source; choose Yes to perform this test. You can also click the Test button to perform this test. The Finish button in the dialog is disabled until at least one data source has been successfully tested.
To create a new data source or edit an existing one, use the Windows ODBC Data Source Administrator dialog. To bring up this dialog, click the ODBC Admin button. To refresh the list of data sources after creating a new one, click the Refresh button.
See the Managing Databases help topic if you need to change your data source setup after you've closed this dialog.
After specifying the settings in that step, click the Next button.
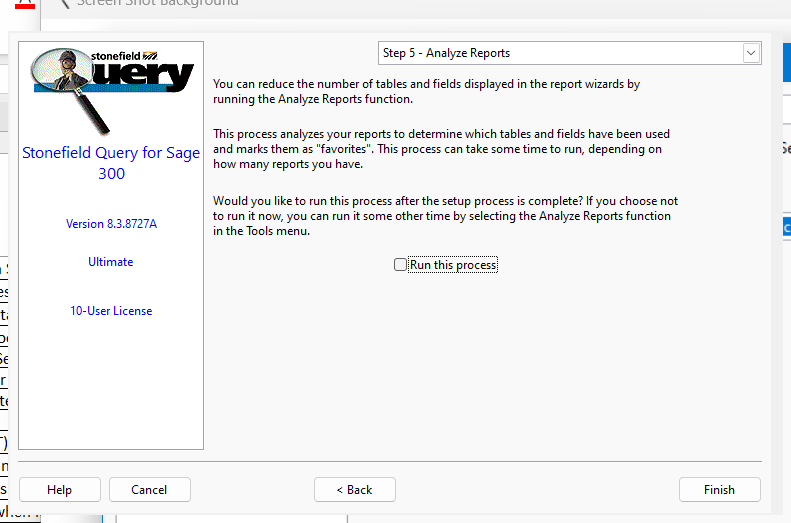
If your database has a lot of tables and fields, you may have a long list to choose from in step 2 of the report wizards, making it difficult to know which fields to select. To make things easier, turn on the Run Process option in this step. It performs the same function as selecting the Analyze Reports function in the Tools menu and the Tools tab of the ribbon; see the help topic for the Analyze Reports function for details. This process may take some time to run, depending on how many reports there are.
After you've closed this dialog, it doesn't normally come up again. If you need to change any settings, see the Configuring Stonefield Query help topic. If you want to force the dialog to appear again, add an Other section to SFQuery.ini and create an Action entry under that section with a value of Setup. For example:
[Other]
Action=Setup
© Stonefield Software Inc., 2025 • Updated: 11/30/21
Comment or report problem with topic