 Lesson 1: Creating a Report
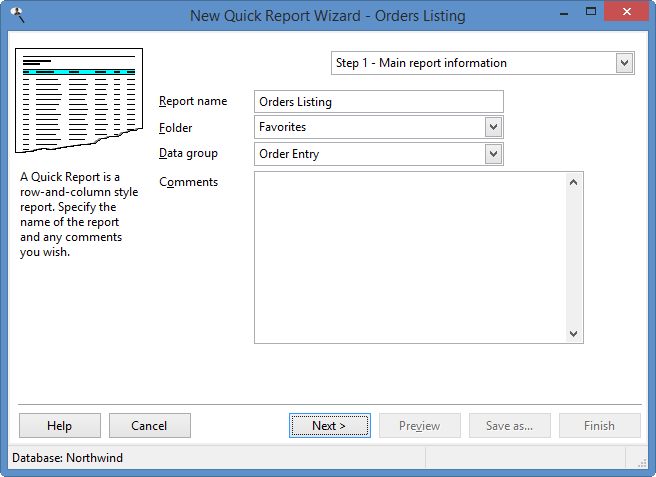
Let's create a report showing history information. Click the New button and select Quick Report as the report type. The New Quick Report Wizard will appear. In Step 1, enter History Report for the report name. Select which folder you want the report to go in and enter any comments you wish about the report.
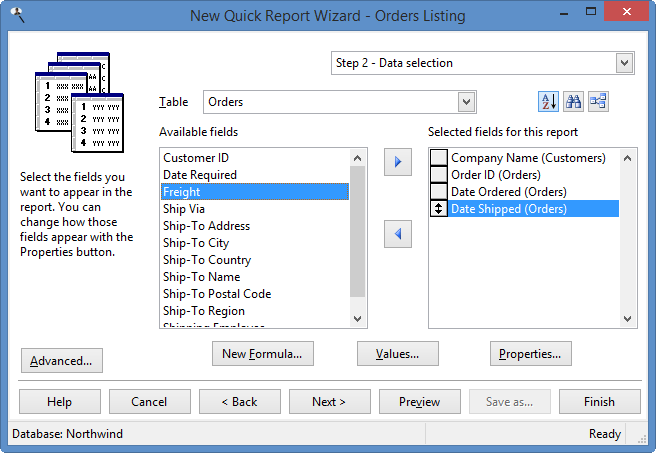
Click the Next button to go to Step 2. Find Company in the Available Fields list, click it, and click the Add button (which looks like a right arrow) to add it to the Selected Fields list.
Select History in the Table list. Find each of the following fields in the Available Fields list, click it, and click the Add button: Activity, Date, Activity Description, Result Description, and User.
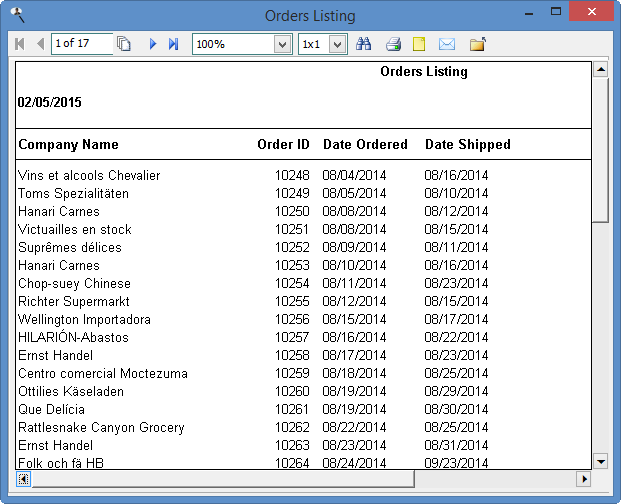
Let's see what the report looks like: click the Preview button (the following image shows a "zoomed out" version of the report, which you can see by choosing 75% from the zoom level list).
Let's change the format of the report a bit. Close the preview window, then select each field in the Selected Fields list, click on the Properties button below the list, and change the settings as shown below:
| Field | Property | Value |
|---|---|---|
| Company | Group on this field Show count in group footer | Checked Checked |
| Activity Description | Width Auto-fit column | 20 Unchecked |
| Result Description | Width Auto-fit column | 20 Unchecked |
Let's preview it again.
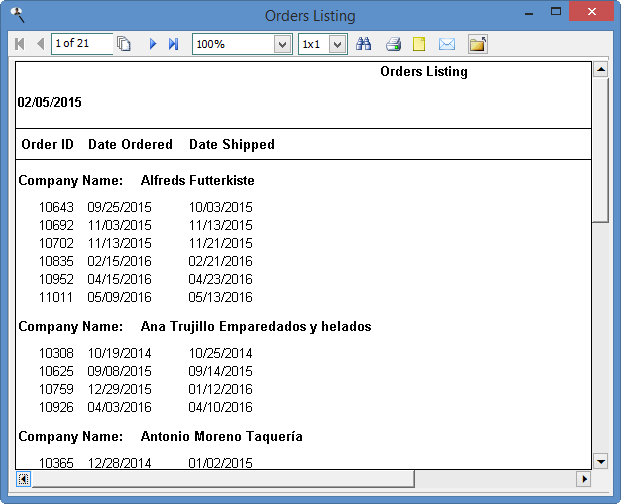
That's more like it. The listing is grouped by company name and is laid out as we expect.
To save this report for future use, click the Finish button. You'll see your new report appear in the Reports Explorer list.
© Stonefield Software Inc., 2025 • Updated: 01/20/21
Comment or report problem with topic