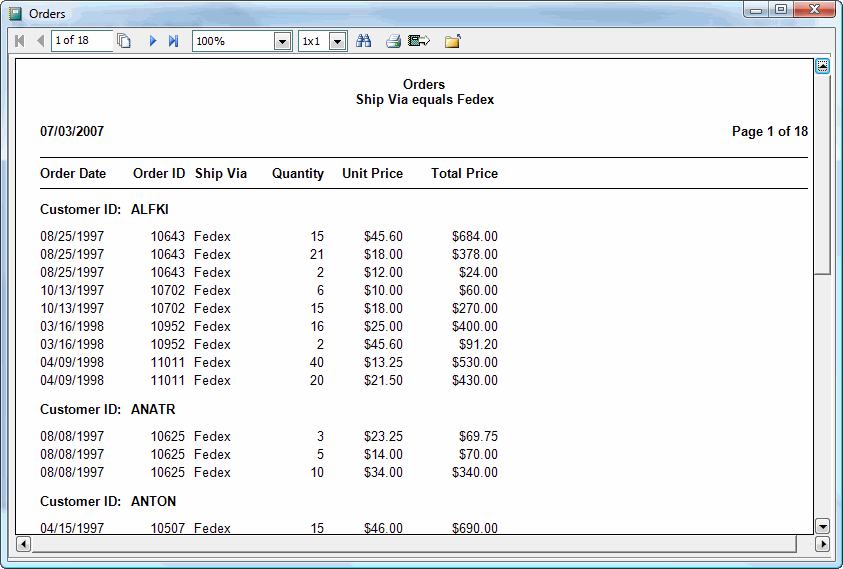
The template selected for a report specifies the overall layout of the report, such as what text goes in the page header and page footer, what default font to use for fields, how subtotals appear, and so on. It also specifies the paper size and source tray or bin. You can completely change the appearance of a report by simply selecting a different template. For example, here's a report using the Standard template:

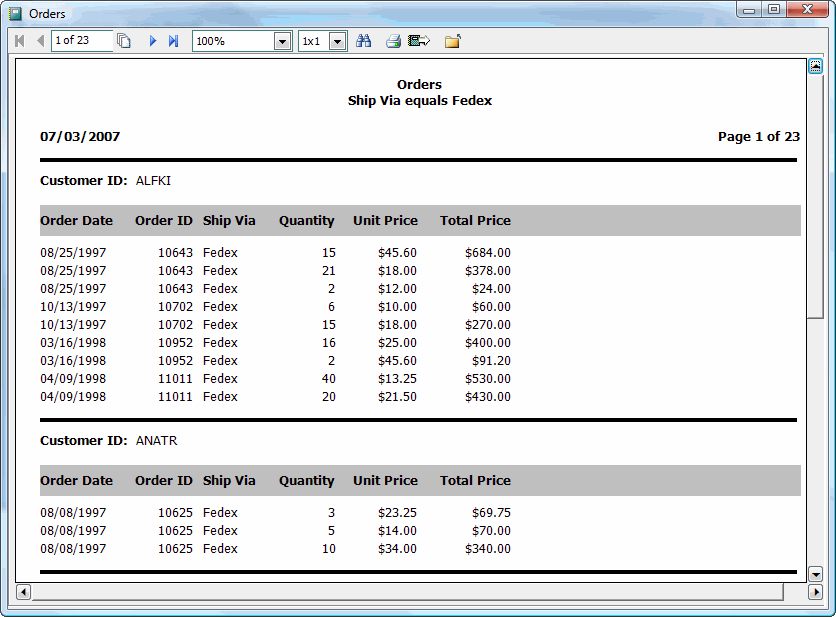
Here's the same report with the only change being switching the template to Fancy Groups 1:

Notice the differences between these two layouts:
Arial is used as the font for the first report while Tahoma is used for the second.
The second report has a grey rectangle around the column headings.
Column headings in the second report appear below the Customer ID group header rather than in the page header.
Many other types of differences are possible.
Reporting4Act! comes with a couple of built-in templates: Standard and Elegant. In addition, there are other templates in the Sample Templates folder of the Reporting4Act! program directory. These are automatically imported the first time you start the application but are available in case you delete some templates and later wish to re-import them.
However, you aren't restricted to using these templates. You can use the Template Editor, available in the Tools menu, to edit the supplied templates or create your own.

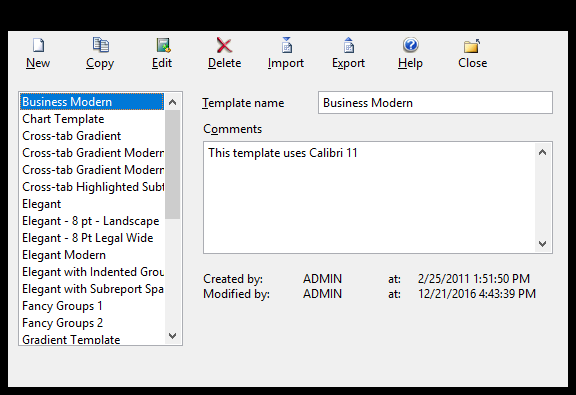
The Template Editor has a list of the currently available templates, a toolbar providing functions for working with templates, and an area at the right showing the properties of the selected template. New templates provided when you update to a newer version of Reporting4Act! are automatically imported when you run the program.
Subtopics of this topic describe how to edit a template, create a new template, copy a template, import or export templates, or remove a template.
You must have an Ultimate license to access the Template Editor.
© Keystroke.ca, 2025 • Updated: 01/05/21
Comment or report problem with topic
 Working with Templates