The General page of the Field Properties dialog has the following options:
Expression: the name of the field or the calculated expression to print. You can use a built-in function or user-defined function for the expression. Click the Expression Builder button (the "..." button) to display the Expression Builder.
Object position: it's possible the height of a band can change when it's printed. For example, the detail band may only appear as one line high in the Advanced Report Designer, but if a field's Stretch with overflow setting is turned on (see below), that field may take more than one line if it contains a lot of information, and therefore so does the detail band. The object position settings allow you to specify what happens to objects when the band they're in changes height. The choices are:
Float: specifies that the selected object moves vertically relative to the size of objects directly above it.
Fix relative to top of band: as the band changes height, this object maintains its position relative to the top of the band.
Fix relative to bottom of band: as the band changes height, this object maintains its position relative to the bottom of the band.
Vertical alignment: specifies whether the object is top (the default), middle, or bottom aligned vertically. This is only relevant if the object is taller than its content.
Stretch with overflow: causes the field to expand down if there is more information in the field than can be displayed on one line. This allows word wrap to occur on longer text fields.
Size and position in layout: rather than trying to precisely size or position an object using the mouse or arrow keys, you can specify the dimensions and location of the object using these controls.
Create/update column heading: turn this option on if you want Reporting4Act! to automatically create a column heading for a new field or update the associated column heading for an existing field. This is useful if you want a column heading to always be in sync with the associated field. For example, changing the field expression so it references a different database field should likely change the caption for the column heading. Turning this on will do that automatically. However, you may want to turn this off if you're creating a field in some band other than the detail band, because you probably don't want a column heading added to the Page Header band in that case.
Adjust field width automatically: this option, which is only available for new fields or if you change the expression for an existing field, automatically sizes the field correctly for the expression you enter if it is turned on. This is useful because it ensures the field isn't too narrow or too wide for the data displayed. However, if you specifically sized the field to a desired width, turn this setting off so it doesn't override your size.
Include in data-only output: turn this option on if you want this field to be included when you output the report to a data-only file, such as Microsoft Excel - Data Format, delimited, or text files.
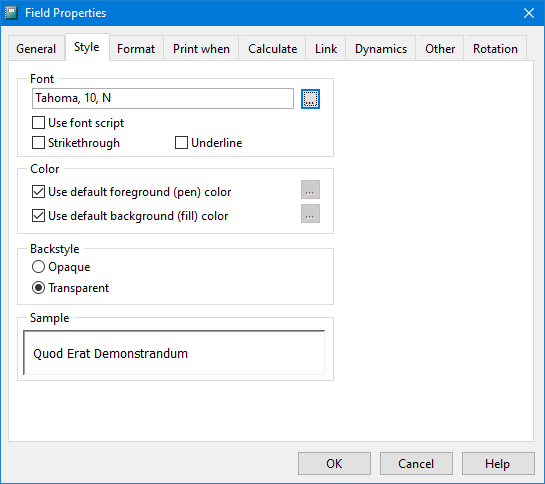
The Style page of the Field Properties dialog has the following options:
Font: allows you to select the font name, style, size, and script for the field.
Use font script: turn this option on to use the script selected in the font dialog for the field. This is only necessary in languages that use something other than Western script, such as Hebrew, Arabic, or Cyrillic. If this is turned on, you will see a number after the font name, size, and style indicating the font charset, such as 161 for Greek.
Strikethrough: turn this setting on to apply the strikethrough style to the field.
Underline: turn this setting on to underline the text in the field.
Use default foreground (pen) color: turn this setting on to use black text for the field. If you turn this setting off, the button beside it is enabled so you can select the color to use.
Use default background (fill) color: turn this setting on to use a white background for the field. If you turn this setting off, the button beside it is enabled so you can select the color to use. Note that when you change the background color of a field, you must also change the Backstyle setting (see below) to Opaque or the color won't show up on the report even though you see it in the Advanced Report Designer.
Backstyle: this setting determines whether objects behind this one can be seen (the transparent setting) or are covered by this object (the opaque setting).
Sample: shows an example of what the text looks like based on the settings you've selected.
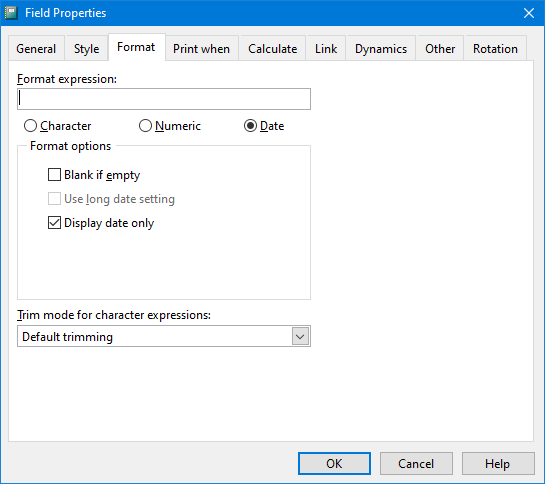
The Format page of the Field Properties dialog has the following options:
Format expression: specifies how the field is formatted. Normally, this is only used for numeric values to indicate whether commas are displayed or not and how many decimal places to use (use "9" as a placeholder for a digit and enter an expression such as "9,999,999.99" to specify where commas and decimals go). However, if you have a character string you'd like formatted in a certain way, you can enter an expression indicating how the string appears. For example, if telephone numbers are stored as just digits (for example, 7085341212), you can format them with parentheses and dashes using "(999) 999-9999".
Character, Numeric, and Date: specifies the data type of the field and determines which of the following options are available.
Template characters: this setting, which is only available when Character is selected, specifies how to handle the format expression. Overlay means punctuation symbols in the expression take the place of characters in the string. To continue the telephone number example above, choosing this option results in "(085) 121-" displayed because the opening parenthesis overlays the "7" in the field value, the closing parenthesis overlays the "3," the space overlays the "4," and so on. Normally, you should choose Interleave, which means the characters in the format expression don't overlay the field value but are instead interleaved with them.
To upper case: converts all characters to uppercase. This item is only available when Character is selected.
Alignment: specifies the alignment of the field: left, center, or right. This item is only available when Character is selected.
Trim mode for character expressions: this setting determines what to do if the value of the field in a particular record is longer than the space allocated in the report. The choices are:
Default trimming: an ellipsis (...) is added to the end of the text indicating there's more data that can't be seen.
Trim to nearest character: this cuts off the text at the last character that fits.
Trim to nearest word: this cuts off the text at the last whole word.
Trim to nearest character, append ellipsis: like Trim to nearest character, but adds an ellipsis.
Trim to nearest word, append ellipsis: same as Default trimming.
Filespec, show inner path as ellipsis: characters at the start and end of the expression appear but middle characters are replaced by an ellipsis.
Left justify: numeric fields are normally right-justified. Turn this option on to use left justification. This option is only available when Numeric is selected.
Blank if zero: displays a blank space if the field contains zero. This item is only available when Numeric is selected.
(Negative): places negative numbers in parentheses. This item is only available when Numeric is selected.
Scientific: displays very large or very small numbers in scientific notation. This item is only available when Numeric is selected.
CR if positive: displays "CR" (credit) after positive numbers. This item is only available when Numeric is selected.
DB if negative: displays "DB" (debit) after negative numbers. This item is only available when Numeric is selected.
Leading zeros: prints all leading zeros. This item is only available when Numeric is selected.
Currency: displays the currency symbol specified in the Regional Settings applet of your Windows Control Panel in front of numbers. This item is only available when Numeric is selected.
Blank if empty: if this option is turned on, a blank is displayed rather than " / / " for blank dates. This option is only available when Date is selected.
Use long date setting: this setting displays dates using the Long Date setting specified in the Regional Settings applet of your Windows Control Panel. This option is only available when Date is selected.
Display date only: turning this setting on displays only the date portion of the field's value. This option is only available when Date is selected.
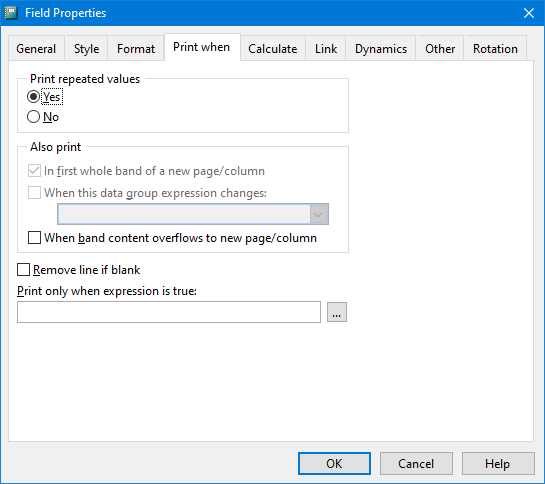
The Print When page allows you to conditionally print an object so it can be ignored under some conditions. It has the following options:
Print repeated values: setting this to No is like turning on the Suppress repeating values setting for a field in the Field Properties dialog of the Quick Report Wizard: if several records in a row have the same value in this field, only the first occurrence is printed; the field in subsequent records appears blank.
In first whole band of a new page/column: prints the object in the first band of a new page or column that isn't an overflow from a previous page or column. This option is automatically turned on (and disabled) if you choose Yes for Print repeated values, and optional if you choose No for Print repeated values.
When this data group expression changes: prints the object when the value of the chosen group changes. This option is available only if a group exists and Print repeated values is No. Choose a group from the list beside this option.
When band content overflows to new page/column: prints the object when the band overflows to a new page or column. This option is available only if Print repeated values is No.
Remove line if blank: removes the entire line of the report the object is on if the object is blank and no other object is on the same line.
Print only when expression is true: an expression to be evaluated before the object prints. If the expression is true, the object is printed; otherwise, it isn't printed. All other options in this dialog except Remove line if blank are disabled if you include an expression. Click the Expression Builder button to display the Expression Builder.
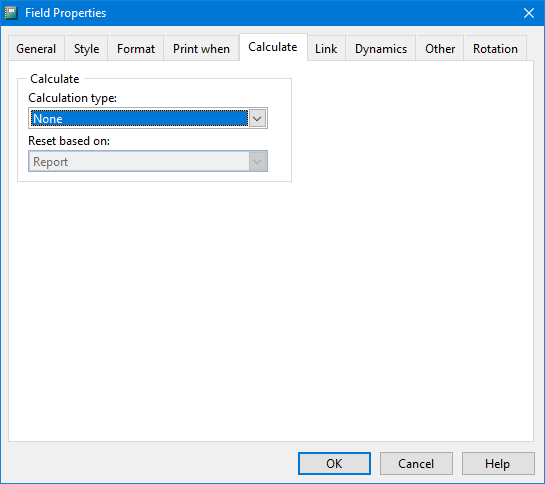
The Calculate page allows you to specify how Reporting4Act! performs calculations on this field. It has the following options.
Calculation type: specifies the type of calculation performed.
None: no calculations are made on this field.
Count: counts the number of times a field is printed per group, page, column, or report (depending on your selection in the Reset based on setting). The calculation is based on the number of times the field occurs, not on the field's value.
Sum: computes the sum of the field's values. This option keeps a running total of the values for a group, page, column, or report (depending on your selection in the Reset based on setting).
Average: computes the arithmetic mean (average) of the field values within a group, page, column, or report (depending on your selection in the Reset based on setting).
Lowest: displays the lowest value that occurred in the field for a group, page, column, or report (depending on your selection in the Reset based on setting).
Highest: displays the highest value that occurred in the field for a group, page, column, or report (depending on your selection in the Reset based on setting).
Standard deviation: returns the square root of the variance for the field values within a group, page, column, or report (depending on your selection in the Reset based on setting).
Variance: measures the degree to which individual field values vary from the average of all the values in the group, page, column, or report (depending on your selection in the Reset based on setting).
Reset based on: allows you to specify the point at which the calculation is reset to 0. By default, Report is displayed, meaning the calculation retains its value until the end of the report. You can also select Page or Column, indicating that the calculation is reset at the end of each page or column. If there are any groups in the report, this option displays an item for each group. If the report has more than one detail band, this option displays an item for each band.
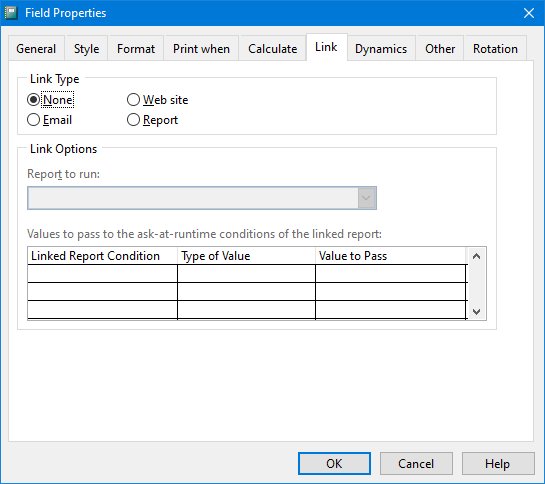
The Link page allows you to link the selected field to an email dialog, a Web site, or a report. A linked field appears underlined in the report Preview window, similar to a hyperlink in a Web browser, in either blue (for email and Web site links) or green (for report links). See the Field Properties topic for more information on linking and the options in this page.
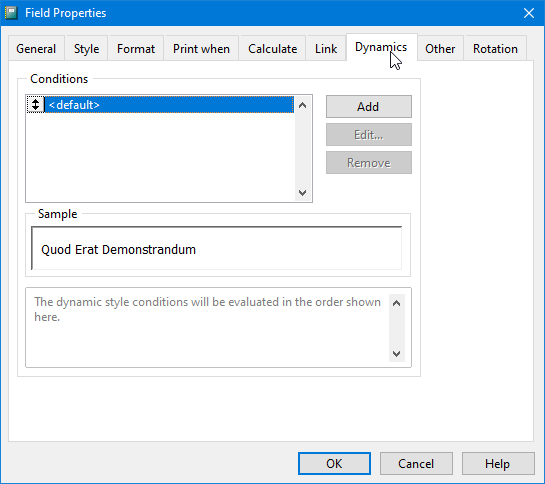
The Dynamics page allows you to change the way the field appears in the report depending on certain conditions. For example, you can have negative numbers display in red and positive numbers in black. This is similar to the dynamic font and color options in the Field Properties dialog but has more flexibility. In fact, if you specify a dynamic font and/or color for the field in the Field Properties dialog, those conditions are shown in the Dynamics page with the names "DynamicStylen" (where n is 1, 2, or 3, depending on the condition) for dynamic font and "DynamicColorn" for dynamic color.
Note that using dynamic settings significantly increases report generation time, so use it only when required.
The Conditions list shows the conditions you've defined. To add a new condition, click the Add button. Enter the name of the condition and click OK. The following dialog appears.
This dialog has the following options:
Condition Name: the name you assigned to the condition.
Apply when this condition is true: the condition that affects the field. You can enter the expression for the condition or click the button with the ellipsis (...) to display the Expression Builder. For example, entering "TotalPrice < 0" means this condition is used whenever the total price is negative. The expression must be something that gives a true or false value.
Text: if you want different text displayed when the condition is true, enter the text or click the button to display the Expression Builder. For example, suppose you normally want to display the quantity on hand but if it's zero, display the text "Sold Out." In that case, use something like "QtyOnHand = 0" for the expression and "Sold Out" for the text.
Font: click the button to select the font, size, style, and script you want to use for this field when the expression is true.
Use font script: turn this option on to use the script selected in the font dialog for the field. This is only necessary in languages that use something other than Western script, such as Hebrew, Arabic, or Cyrillic.
Strikethrough: turn this setting on to apply the strikethrough style to the field.
Underline: turn this setting on to underline the text in the field.
Use default foreground (pen) color: turn this setting on to use black text for the field when the condition is true. If you turn this setting off, the button beside it is enabled so you can select the color to use instead.
Use default background (fill) color: turn this setting on to use a white background for the field when the condition is true. If you turn this setting off, the button beside it is enabled so you can select the color to use instead. Note that when you change the background color of a field, you must also change the Backstyle setting (see below) to Opaque or the color won't show up on the report even though you see it in the Advanced Report Designer.
Backstyle: this setting determines whether objects behind this one can be seen (the transparent setting) or are covered by this object (the opaque setting).
Sample: shows an example of what the field looks like when the condition is true based on the settings you've selected.
Click the Edit button to display the same dialog shown above to edit the condition settings or Remove to remove the condition. You can also change the order in which conditions are applied by clicking the button in front of the condition name in the list and dragging up or down.
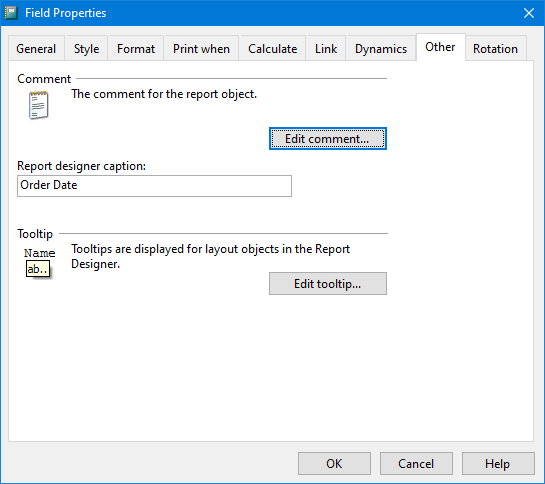
The Other page allows you to specify additional information about a field. It has the following options:
Comment: displays a comment about the field. To change the comment, click the Edit comment button.
Report designer caption: the descriptive name displayed in the Advanced Report Designer for this field.
Tooltip: the text that displays for this field when you hover the mouse pointer over it in the Advanced Report Designer, the Preview window, in a PDF file, and in an HTML file. This is usually used to display longer descriptive information than the caption. To change the tooltip, click the Edit tooltip button.
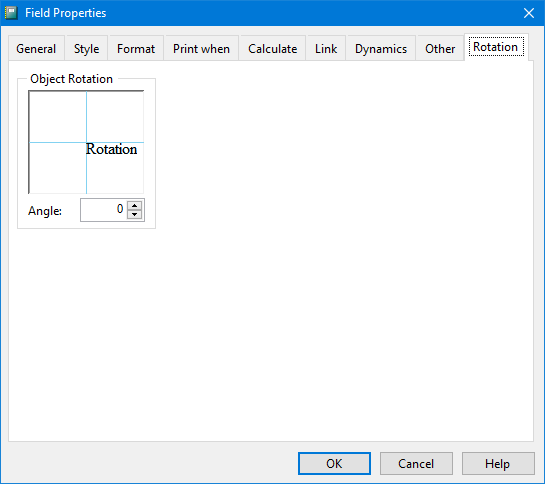
The Rotation page allows you to rotate an object on the report by specifying the rotation angle as a clockwise value (for example, an angle of 90 rotates the object 90 degrees clockwise). A representation of the rotation is shown so you can tell whether you have the desired angle. Note the object doesn't appear rotated in the Advanced Report Designer, but only when the report is run. Also note that using rotation significantly increases report generation time, so use it only when required.
© Keystroke.ca, 2025 • Updated: 04/16/21
Comment or report problem with topic
 Field Object Properties